Upgrade project
This short article shows how to upgrade your existing project to a new release of Nitisa.
About it
Usually working on a project takes some time and many things may change from the moment when you started to work on your project till it is finished. One of the things that may happen it's a new release of the Nitisa framework. Although upgrading a project to a new version of the framework is really easy it might not be obvious. Lets see how it should be done in both cases: standalone (when you downloaded Nitisa as source code from this portal) and extension (when you installed Nitisa as an extension for Visual Studio).
Standalone
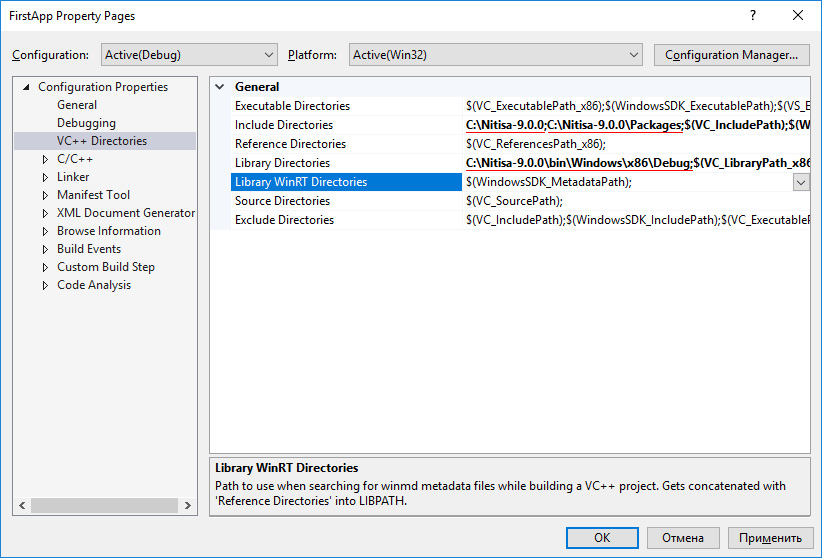
You might recall from the Get Started article how to setup new project in standalone mode - in the mode when you download source code of the Nitisa from this portal. From that article you might also recall one particular moment: a moment where you setup directories for your project. There you specify directories where Nitisa is and directory Packages inside and where built libraries are. To upgrade project to a new release all you need is to change that directories. That's all.
Extension
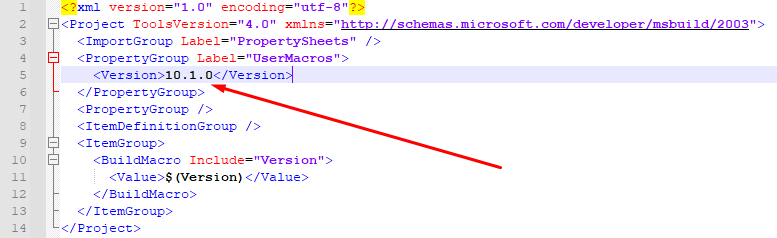
If you created your project with Nitisa extension for Visual Studio and upgraded the extension to a new version, you also need to upgrade the project. In this case upgrading even easier then in previous case. All you need is to find a file called PropertySheet.props in the folder where your project is, open it in a text editor and change version to the currently installed extension version.