Creating a Package
Once you have finished your control(s) you might want it to be properly appeared and managed in the Form Builder. This article describes how to achieve this.
Introduction
Property list
Event list
Package control
Package components, list items,...
Package itself
Compilation and installation
Introduction
If you want your control appear in Form Builder and be properly managed in it, you must describe it in the way the Form Builder could understand it. Such a description is made by writing several classes and putting them together. All the descriptions are separated from the control. It is done to avoid including unused information in the final applications.
Property list
Usually control has properties and you have to describe them to Form Builder. To do it you have to create class derived from IPropertyList and implement it's methods. There is a helper class implementation called CControlPropertyList you will find very useful for this goal. Using this class you have only to add all the properties of your control in your class constructor. In example below you can see a simple class derived from CControlPropertyList. In it's constructor only one property is added to the list.
#pragma once

#include "Nitisa/Package/Properties/PropertyString.h"
#include "Nitisa/Package/PropertyLists/ControlPropertyList.h"
#include "../../../Controls/Button/Button.h"

namespace nitisa
{
    namespace standard
    {
        class CButtonPropertyList :public CControlPropertyList
        {
        public:
            CButtonPropertyList(IPackage *package, IControl *control, IPackageEntity *entity) : CControlPropertyList(package, control, entity)
            {
                Add(new CPropertyString(this, control, L"Caption", false, nullptr,
                    [](IClass *parent) {return cast<CButton*>(parent)->getCaption(); },
                    [](IClass *parent, const String value) {return cast<CButton*>(parent)->setCaption(value); }));
            }
        };
    }
}
You have to include CControlPropertyList header file as well as the file with declaration of your control. You also have to include declarations of all property types you use. In this example we use only string type property which is described by CPropertyString class. The property list has useful method Add to add a property description to internal list. It gets a property class pointer and returns this pointer as well. Common properties have several parameters in their constructors. Usually they are a pointer to the list(this), a pointer to a control, property name(will be displayed in the Form Builder), whether a property is read only or not, callback function which should check whether this property should be skipped when creating a form prototype in Form Builder save, callbacks for getting and setting value in the control associated with the property. These options are shown in the example above. For the properties which can have different values depending on the control state there are similar property classes. They usually located in the same place just with State at the end of header file name and their names ends with "State"(for example CPropertyStringState). It also has an additional option in constructor - a list of state names. You may find all the available in the framework core properties in the folder Nitisa/Package/Properties. Some packages add a few more property types. You can find them in the package subfolder Package/Properties. In the most cases all you need is just to copy and paste adding some property code and change it's caption, control class name in casts, setter value type, and getter and setter of the control right after the casts.
When you derive property list form CControlPropertyList it adds all properties available in CControl and CComponent. If you don't want some of them to be available in Form Builder, just call Delete method with one argument - name of the property.
Properties having multiple states have got new argument const ExportPrefixType state_prefix_type before state items. This argument specify how state names will be prefixed. For example, if you specify eptNone as state prefix type, states will be exported in form prototype header file as is, without any prefix. If you specify ExportPrefixType::Parent, states will be exported prefixed with control class name. Lets say for instance your control class name is Grid and it is placed in superwidgets namespace and it has states declared inside control class. So in this case, if you have state called State::Hovered it will be exported as CGrid::State::Hovered. If you specify export property type as ExportPrefixType::Namespace it will be prefixed with namespace: superwidgets::State::Hovered. And finally using ExportPrefixType::NamespaceParent will prefix state with both namespace and control class: superwidgets::CGrid::State::Hovered.
Enumeration type properties CPropertyEnum and CPropertyEnumState have argument const ExportPrefixType prefix_type with absolutely the same meaning and behaviour as just described one. The only difference is it is applied to enumeration items, not to states.
We strongly recommend to use export prefix types instead of hardcoded prefixes. From using it depends the Form Builder's overwrite headers and namespaces feature.
Event list
For the events you have to do the very similar thing, create a control event list class. It should be derived from IEventList and, of course, there is a helper implementation of it called CControlEventList. Everything said for the property list can be applied for event list as well. The only difference is that there is no special types of events, all events use only one class called CEvent and it has much less parameters.
#pragma once

#include "Nitisa/Package/Core/Event.h"
#include "Nitisa/Package/EventLists/ControlEventList.h"

namespace nitisa
{
    namespace standard
    {
        class CButtonEventList :public CControlEventList
        {
        public:
            CButtonEventList(IPackage *package, IControl *control, IPackageEntity *entity) :CControlEventList(package, control, entity)
            {
                Delete(L"OnHotkey");
                Add(new CEvent(this, control, L"OnClick", L"IControl *sender", L"sender"));
            }
        };
    }
}
CEvent constructor has only 5 parameters: pointer to the event list, pointer to the control whose event list it is, name of the event, event callback arguments declaration, and event callback argument list. In this example the event is declared in control as void(*OnClick)(IControl *sender);. You can also see how to delete event if it is not required. You may left all events from CComponent and CControl but often it can be useless. For example, the Button doesn't handle hotkeys. If we had left this event, the user would have been able to edit it in Form Builder but it has no sense because Button doesn't handle hotkeys at all. We recommend to delete unused default properties and events.
In the example above you see that the signature is IControl *sender. But often there should be widgets from your own packages. Lets say you create your own cool button and its OnClick event has sender ICoolButton *sender. Doubtless it will be inside the namespace of your package, like coolwidgets. In this case the obvious choice is to add event by following line of code.
Add(new CEvent(this, control, L"OnClick", L"coolwidgets::ICoolButton *sender", L"sender"));Since the release of 9.0.0 we recommend to use namespace placeholder instead of hardcoded namespace in such a case. So it should be:
Add(new CEvent(this, control, L"OnClick", L"{namespace}ICoolButton *sender", L"sender"));The namespace placeholder is used by Form Builder in overwrite includes and namespaces feature. That is why we recommend to put there {namespace} instead of hardcoded coolwidgets:: one.
Package control
Once we have described properties and events of our control, we have to describe a control itself now. It should be done by creating a class derived from IPackageControl. And, as usually, there is a helper class for it with partial interface implementation. This class is called CPackageControl. Here is an example.
#pragma once

#include "Nitisa/Package/Core/PackageControl.h"

namespace nitisa
{
    namespace standard
    {
        class CPackageButton :public CPackageControl
        {
        private:
            Image m_cIcon; // Icon of the control
        public:
            String getCategory() override; // Returns category name(tab name) where to place control in Form Builder components and controls section. Form Builder will create a tab automatically if there is no one with such name yet
            String getClassName() override; // Class name of the control. It is "Button" in this example
            String getTitle() override; // Returns control title or name
            String getDescription() override; // Returns control description. May be empty
            String getReferenceUrl() override; // Returns an URL of the article about control in documentation. Currently not used. Leave empty
            const Image *getIcon() override; // Returns the icon for the control. Can be empty but we recommend to add unique icon so that user can easy identify your control among others
            bool isVisible() override; // Returns whether control should be displayed in Form Builder components and controls section or not
            bool isDisplayIcon() override; // Return whether an icon like for components should be displayed as well. For example, MainMenu has such an icon visible in Form Builder together with control itself
            bool isInstance(IControl *control) override; // Should check whether the specified control is an instance of the control class handled by this package control. Use cast function to check whether the "control" could be converted to "CButton"
            bool isTransformable() override; // Whether control could be translated/scaled/rotated in Form Builder. If false, the control won't be transformable in form editor of the Form Builder

            IControl *Create(IPropertyList **properties, IEventList **events) override; // Create control(Button) and it's property and event lists
            IPropertyList *CreatePropertyList(IControl *control) override; // Create only property list for the specified control(should be checked if the control is Button or not)
            IEventList *CreateEventList(IControl *control) override; // Create only event list for the specified control(should be checked if the control is Button or not)

            CPackageButton(IPackage *package); // Constructor
        };
    }
}
On the picture below you may see how to define an icon for the control.
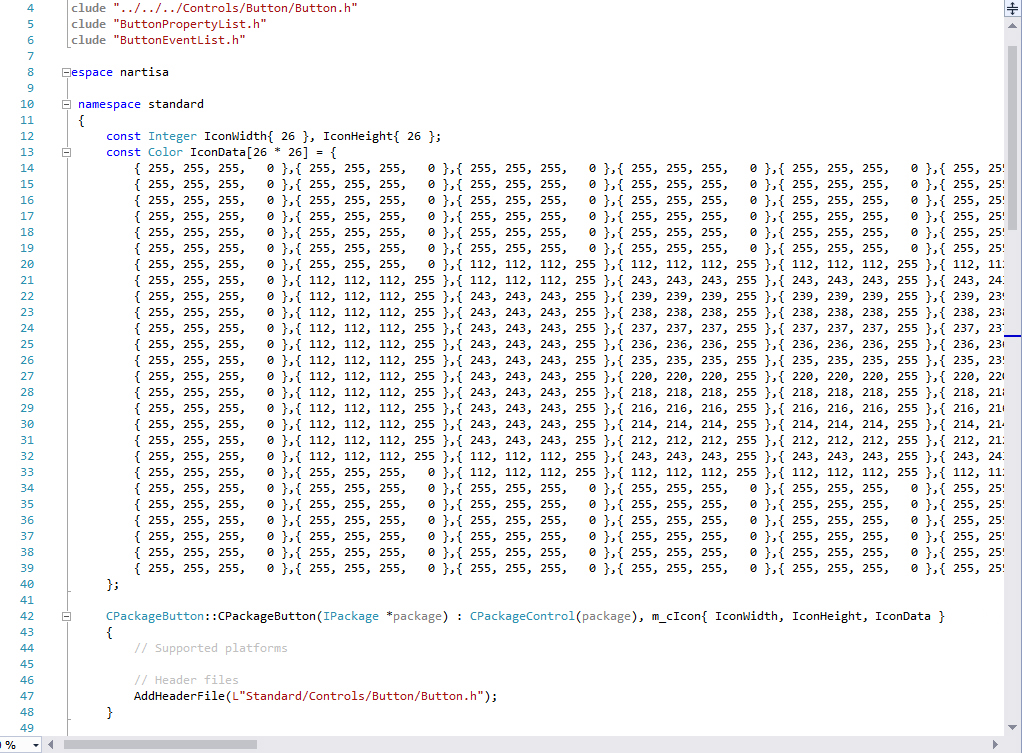
In the constructor you also should add supported by the control platforms. Don't and any if all are supported. And also add the header file path relative to the Packages directory of the framework.
It is important to notify the package(we will discuss the package shortly) about a new control creation. It should be done in the Create method. Here is an example. It is usually similar for all the controls, only the class names are different.
IControl *CPackageButton::Create(IPropertyList **properties, IEventList **events)
{
    IControl *result{ new CButton() };
    *properties = new CButtonPropertyList(getPackage(), result, this);
    *events = new CButtonEventList(getPackage(), result, this);
    getPackage()->QueryService()->NotifyOnCreateControl(result, this, *properties, *events);
    return result;
}
All other methods are really simple and you can understand from the comments in class declaration above what they should do.
Package components, list items,...
We have explained how to describe a control. As for the other entities like components, list items, forms,... it is absolutely the same. Just find required interface in Nitisa/Package/Interfaces and corresponding implementation in Nitisa/Package to not start from scratch and use already written code. For example, you can find IPackageComponent, CComponentEventList, IPackageListItem and others there. You can also see how it is done in Standard package source code and do the same for your entities.
Package itself
Now we have complete control description for the Form Builder. But it doesn't accept individual controls, it accept a set of controls, components, and other entities. This set is called Package. As usual we have to create a class describing our package and add our control to it. The package class should implement IPackage interface. It also should have a service derived from IPackageService. There are no helper classes for these interfaces. This means you should implement everything by your own. Fortunately it is not hard. IPackage is just an aggregator of the entities included in package. It just should provide information about how much entities it has and be capable of search such an entities by different parameters. The package service is used to notify the package about components and controls creation and destruction. For example, we do it in Create method of the package control class. You can find Standard package classes at Packages/Standard directory. It's logic is quite simple and we will not show any examples here.
Compilation and installation
To add controls and other entities from your package to Form Builder you should compile your package in a dll file. Your package dll file have to export function called GetPackage. It should look like following.
nitisa::IPackage* __stdcall GetPackage(nitisa::IApplication *application)
{
    if (application)
        nitisa::Application = application; // Initialize Application variable with application object provided by Form Builder. You have to add #include "Nitisa/Interfaces/IApplication.h" somewhere at the file beginning
    return new nitisa::standard::CPackageStandard(); // Create and return you package class instance. You have to include corresponding file somewhere at the file beginning
}
The dll should be linked dynamically with Microsoft Runtime Library. The version of runtime should be the same as your version of Form Builder has. Visual Studio 2017(v141) is the one Form Builder is built with.
After you successfully compiled you package and got a dll file. You have to place it to the same folder where the Form Builder executables are.
You may use DebugRT builds and debug your package by running it with Form Builder from Visual Studio in debug mode.
You may include in packages any code you wish to share. It could be not only components and controls but also additional modules and sets of useful functions. It's all up to you what you want to include in the package.