Graphics
This article describes powerfull graphical module of the Nitisa framework. After reading it you will know how to use it and draw almost everything you want easily.
About module
Graphics module is responsible for 2D drawing operations. It performs all drawing using CPU and system memory. It's purpose is to provide drawing possibilities on systems which don't have graphical processing units(GPU). The Windows GDI renderer uses this module for drawing operations(the GDI part is only used to represent what was drawed onto a screen). The module can be added to your source code by #include "Nitisa/Modules/Graphics.h" line. It is implemented as a set of templates and do not require of adding any source files into compilation process. You only have to include header file(s). This module also depends on Mathematical module.
Architecture
The module have several entities representing different kinds of graphical and helper objects. They are
- TPixel is a base unit of all graphical operations. It represents color.
- TBitmap describes 2D image which is made of pixels.
- TPath is a powerfull helper type used to describe different shapes.
- TVertex represents a point in space which have also texture and other coordinates.
- TTriangle describes simple 2D primitive - triangle. Every other, more complex, primitives could be represented as a set of triangles.
These objects are used in drawing operations. The drawing operations are separated into 2 groups. The first one is a common drawing and is a set of functions located in nitisa::graphics::draw namespace. The second group of functions is responsible for anti aliased drawing operations and is located under nitisa::graphics::drawaa namespace.
Besides these main objects and functions there are some helper entities and functions. For example, you may find some usefull functions for building some pathes under the nitisa::graphics::path namespace.
Some drawing functions have extended versions which allow to specify custom renderer - an object responsible for pixel color calculation.
Examples
Lets look on some examples demonstrating how to use objects and functions from the module.
Draw line
graphics::draw::Line<4, unsigned char, int>(
    bmp, // Bitmap of type graphics::TBitmap<4, unsigned char> where to draw the line
    { 10, 10 }, // Line start point
    { 100, 30 }, // Line end point
    (Color)CColors::Green, // Line color
    graphics::blCanvas); // Blending type(this one is commonly used for proper opacity handling)
The result is like one below
Draw splitted rounded corner rectangle
graphics::TPath<int, double> path; // Declare path variable
graphics::path::Rectangle<int, double>(path, { 10, 10, 100, 50 }, { 10, 10, 10, 10 }); // Make path of rounded corner rectangle shape, where rectangle left-top corner is at { 10, 10 } point and right-bottom is at { 100, 50 } point, and all corners have radius 10
graphics::draw::Path<4, unsigned char, int, double>( // Draw the path having different colors depending on which side of the line the point is
    bmp, // Bitmap of type graphics::TBitmap<4, unsigned char> where to draw the path
    path, // Our path
    { 0, 0 }, // Splitting line start point
    { 100, 40 }, // Splitting line end point
    (Color)CColors::Green, // Colors of rectangle pixels which are at the left of the splitting line
    (Color)CColors::Blue, // Colors of rectangle pixels which are at the right of the splitting line
    graphics::blCanvas); // Blending type
The result is like one below

Draw rotated image
math::TTensor<double, 4, 4> r, t; // Declare transformation matrices
math::rotate_z(r, math::DegToRad(15.0)); // Fill rotation matrix with values which will rotate the image by 15 degrees around Z-axis
math::translate(t, 40.0, 10.0, 0.0); // Fill translate matrix with values which will move image by 40 pixels in X direction and 10 pixels in Y direction
graphics::draw::Image<4, unsigned char, int, double>( // Draw rotated and shifted image
    bmp, // Bitmap where to draw the image
    image, // Bitmap to be drawn(should be the same type as bmp)
    r ^ t, // Image transformation matrix(combined rotation and translation matrices)
    graphics::blCanvas); // Blending type
The result is like one below
Draw anti aliased line
graphics::drawaa::Line<4, unsigned char, int, double>(
    bmp, // Bitmap where to draw
    { 10, 10 }, // Line start point
    { 100, 100 }, // Line end point
    (Color)CColors::Red, // Line color
    graphics::blCanvas); // Blending type
The result is like one below
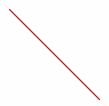
If you compare this image with the one from first example, you will see that anti aliased functions draw more neat images. This is true but you have to avoid using anti aliased drawing in all places where common drawing functions produce good enough result. You always have to remember that anti aliased drawing is much more expensive then common one and use it only when it is really necessary.